Thursday, November 2, 2017

Road Trip/Bucket List Vacation...

Hubs & I got back last Friday from a 4,000 mile road trip...and Bucket List vacation.  Our main goal was to go to Mt. Rushmore.  I also knocked 4 more states off my list...South Dakota, North Dakota, Montana and Nebraska.

Day 1  (Oct. 20) ended in Davenport IA.  We had enough time to check the place out and walk up to the Skywalk that overlooked the Mississippi River.  Amazing!!  We had a great dinner at Lynn's BBQ & Saloon.

Day 2 had us driving all the way west...then all the way north...before we were finally OUT of Iowa!!  We stayed in Wall SD in a little (individual) log cabin.  It was very cozy and nice...and the people we met the next morning at breakfast were so friendly!!  Dinner was at a recommendation from Yelp at Two Bit Saloon.  I have to say...the was the first time Yelp was totally WRONG.  This place did not fit a 4-5 star rating!!

Day 3 took us to The Badlands, Ellsworth AFB Museum, Minuteman Missile and seeing Mt. Rushmore lit up at night.  WOW!  Dinner was at Gas Light in Rockerville SD...and our hotel was in Rapid City SD.
This is us at the Badlands.  Almost like a mini Grand Canyon without all the color.

And...we saw the most spectacular sunset on our way to dinner near Rapid City SD!!

Day 4 was Custer State Park and Mt. Rushmore.  Luckily, we stopped at the Visitor's Center at the state park.  We happened to hear them talk to someone else about 'the tunnels', so I asked.  From the scenic drive around the state park, there are 3 tunnels (the direction we were driving).  When you get through 2 of the tunnels, Mt. Rushmore is straight ahead.  The 3rd tunnel it's in your re-view mirror.  There are just no words to describe the beauty of that monument!!  Dinner at Firehouse Brewing Co. in Rapid City was pretty good!


Day 5 we drove 2-1/2 miles up a curvy, gravel/dirt road...THEN hiked almost 1/2 mile up the mountain on a gravel trail to get us to Mt. Roosevelt.  Spectacular views!!  It was soooo  worth the effort to get there!!  Then we were off to North Dakota & Montana...hey, have to check them off my list, right?!  We stayed that night in Sundance WY to be ready for our next day's outing before heading home.
Mt. Roosevelt

Day 6 was fairly short drive to Devil's Tower.  We kept seeing it in the distance, but once close up, it was unbelievable!!  Then we started the trek home.  We stayed in Rapid Falls SD...and it was there, at Taphouse 41, that I had my best meal!!  Bill had a burger, I had a burger salad.  Oh.My.
You can see how tasty it looked...well, it was very tasty!!


This photo is of us in Custer State Park.  Weather was beautiful our entire trip (just rained a very short time on our way out...and again on our way back, while driving).  But...it was VERY windy the entire time!!

Day 7 was another driving day, staying in Peoria IL.

Day 8 had us arriving home early/mid afternoon.

It was a long drive, but it was one of our best vacations for sightseeing.  I'd recommend it to everyone!!  Our only complaint was the food...or lack thereof in tastiness.

P.S.  AND...I lost 1 pound while on vacation!!!

Friday, October 13, 2017

Not much going on...

Just a quick little post to say I've not been doing much in the kitchen where I've photographed food.

On Labor Day, I started on a Keto/LCHF (low carb high fat) way of eating.  I'm doing well eating this way...and it's much easier than I thought it would be! And boy, do my joints ever feel better with the extra fat in my diet!!!  I'm still working on a 'grove' to get things rolling with new recipes.  What it comes down to is the need to be more organized and do a monthly menu plan, which I did all the time when raising my 3 kiddos.

Here I was making my dad's famous grilled chicken.  The 'sauce' is nothing but butter, Worcestershire, vinegar, salt and water.  Low & slow & SO delicious!!  The boys were over for dinner and I just forgot to snap a picture of the finished/cooked chicken.
Here's my dad's special sauce:

  • 1
    pint water                                                Heat all ingredients till butter melts.
  • 1
    pint vinegar                                             Keep it warm throughout grilling.
  • ½
    lb. butter                                                 Use mop/squirt bottle to keep sauce on chicken
  • 3
    Tbsp. salt                                                       throughout entire grilling.
  • 2
    Tbsp. Worcestershire                             Grill on med/low until chicken is very tender, 
                                                                           adding sauce often.                                                               

    This is a LOT of sauce.  I usually cut the recipe in half if I'm only doing a couple of chickens.  I either cut them in half or quarters & start the grilling process with skin side DOWN.


This was a quick cabbage, onion & smoked sausage dinner I threw together.  No recipe needed.  Just browned the sausage & removed from pan while sautéing the onions & cabbage.  Then threw it all together.  We like our cabbage on the 'firmer' side.  It was delicious.


Tuesday, August 29, 2017

Apple season...

Hubs went out Sunday to an orchard near us and picked a bag of Gala apples.  This was his reward. This is not a dinner plate...it's a platter!!


There is no recipe for this.  I had leftover pie dough in the freezer from all that pie making I did around July 4th.  I let it thaw in the fridge overnight, then made this galette  yesterday afternoon

For the apples, I sprinkled with Fruit Fresh while I was cutting them, to keep them from browning.  I added boiled cider, a pinch of apple pie spice and a little drizzle of vanilla.  I mixed about 1/2 cup granulated sugar, 1/4 cup brown sugar and Instant ClearJel...then added it to the apple mixture.  You need to mix (completely) the ClearJel with the sugar to keep the thickening agent in the jel from being a globby mess.  Of course, I brushed it with some milk and sprinkled sugar on the dough!  It was baked on a parchment lined baking sheet, at 375, about 50 minutes.  The apples were still a little firm (the way I like them).  Add some vanilla bean ice cream...aahhhh 

Saturday, August 12, 2017

Yummm...

I see Peach Crisp in my near future!!

Yesterday we went to a local orchard after hubs got an email saying they had way too many peaches and were selling 'as is' (aka...not sorted, just put in a box when picked) and at a very good price.  So...for now...we brought home a 1/2 bushel.  Some for instant gratification (my breakfast smoothie was wonderful), some to give to my daughter and some to be diced, flash frozen then vacuumed packed.

Oh.  I'm also making vanilla bean ice cream today to go with the Crisp.


Hopefully, I'll not be so excited about making the Peach Crisp that I'll forget to take photos!!

Sunday, July 16, 2017

Cookies...

If there's one thing you can't have too many of...it's a great cookie recipe, especially if it includes chocolate chips!  I McGyver'd these over the weekend.  I took some to my daughter's yesterday when I went to watch the little granddude for a few hours.  She text'd me later telling me 'those cookies are a keeper'.

Then made another batch today to give to Marshall (my oldest) since he was coming over for dinner. I mentioned cookies and fresh walleye from Lake Erie and he was all about joining us!!

Duh...I did not take any photos when I made them.  I thought about it with the first batch, but since it was my 'test' batch, I didn't.  Then today...just forgot.

I did not put in any raisins in either batch.  I knew Marshall didn't want any, so just left them out. Next time I'll make them with maybe 3/4 cup of both chocolate chips and raisins.


Here's the finished product!!  Yep...it was quite tasty.  It's resting on a plate that was my husband's paternal grandmother's.  I love to use our family treasure.  I use the same grandmother's silverware every day.  Why keep those lovelies packed away.

Here you go:

Chewy Oatmeal Chocolate Chip Cookies
  • 2
    c. all-purpose flour
  • ½
    tsp. baking soda
  • ½
    tsp. salt
  • 1
    Tbsp. cornstarch
  • ¾
    c. butter, melted (1½ sticks) OR softened butter *
  • 1
    c. packed brown sugar
  • ½
    c. white sugar
  • 1
    Tbsp. pure vanilla extract
  • 1
    egg
  • 1
    egg yolk
  • c. old-fashioned oats
  • 1-½
    c. chocolate chips
  • 1
    heaping cup raisins (optional)

    Preheat the oven to 325 degrees.
    Line cookie sheets with parchment paper. Your cookies turn out so much better with parchment paper. OR use a silpat.

    Melt butter and let cool slightly.

    Mix flour, baking soda, salt & cornstarch; set aside.

    In a medium bowl, cream together the melted butter, brown sugar and white sugar until well blended. Beat in vanilla, egg, and egg yolk for 2-3 minutes until light and creamy.

    Mix in the flour mixture until just blended.
    Add the oats and any chocolate chips, nuts,or raisins. Mix until just blended.

    Place 1/4 cup balls of dough onto parchment lined cookie sheet and bake for 14-16 minutes. Do not over bake. The edges should look brown and the centers still slightly soft. Let the cookies rest on the cookie sheet for a couple of minutes before transferring to a cooling rack.

    These were PERFECT at 14 min. on convection bake in my oven.

    * I made these with melted butter and softened butter.  There was no difference in the taste but the melted butter did bake up to be a prettier cookie.  That said, I don't know that I'd take the time in the future to melt the butter.  But...if I've got Ghee sitting on my counter, I'll try that next time.


Friday, July 7, 2017

Pies...Pies...and MORE Pies

A lot of pies came out of  my kitchen this July 4th holiday.  First there was the 'trial' (blueberry) I did since I was using a new dough recipe (see below).  Hubs won out there!


Then we went to a 4th of July party at a friend's house.  I was given desserts!!  Woohoo!!
There's a Blueberry/red raspberry pie, Blueberry pie and a Brie/black & red raspberry pizza.  I will be posting the Brie pizza recipe soon.


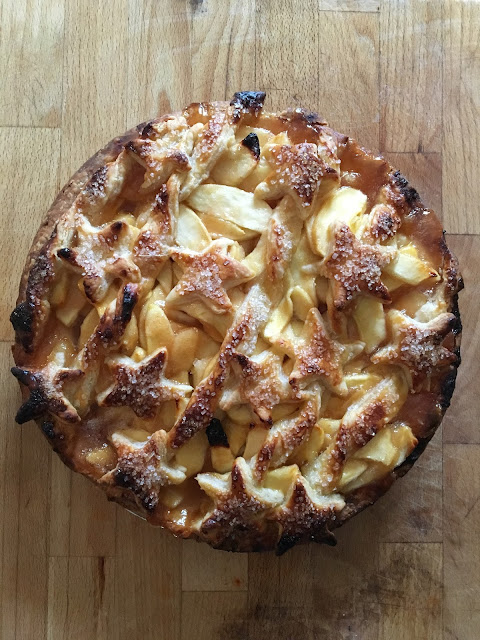
My older son wanted to learn how to make pies so we had a Pie Making 101 class in my kitchen!! Apple is one of his favorites, so that's what he made.  Except for the arrangement of the stars/stripes, he did everything!


Then...we had all the kiddos and the granddude over for a cookout on the 4th.  This one is blueberry and I made homemade vanilla bean ice cream to go with it.  Duh...this is pre-baked since I forgot to snap a photo when I took it out of the oven.


The new pie crust recipe I tried is from THIS class on Craftsy.  You'll have to go there for the recipe (don't want to infringe on Gesine Bullock-Prado's or Craftsy's copyrights).  All I'll say is the recipe is an all butter with a bit of lemon juice mixed with the water.  I got her Craftsy class FREE from a link I found online right before the July 4th weekend. But...if you can get her class on one of their 'sales'...go for it...it's worth it!!  I consider myself an 'advanced' pie maker and I learned some great tips from Gesine.  Just like anything else...whether baking, cooking, knitting, sewing or quilting...you can't have too much knowledge.

In all the pies, I used CLEAR JEL.  It's an amazing product and I purchase it directly from King Arthur Flour.  I also use only King Arthur flours in my kitchen.  I can't say enough about the great quality of their product, whether an ingredient, tool or gadget like a digital scale.

Friday, June 23, 2017

Roasted Veggies

I had a friend over for dinner last night and I roasted a chicken breast (wrapped in a pineapple peel, which of course I forgot to photograph) and a bunch of veggies.  That was a perfect meal for the two of us.  Floated in the pool, talked, had a great meal.  It was a wonderful evening...one that doesn't happen often enough.

So...this morning when I opened my fridge, I saw all the rest of the veggies.  Since we're having pizza for dinner, I decided to roast some more veggies...some for lunch and some for the pizza (well, at least mine).

Here's my cast of characters:
cabbage - carrots - onion wedges - brussel sprouts - mini peppers

...and added tomatoes about half way through.

Out of the oven:

My lunch drizzled with a little balsamic:

Packaged for the fridge...some of which goes on pizza for dinner tonight:

There really isn't a recipe, but here's what I did...

Roasted Veggies
Preheat oven to 400 F (convection if you have it)

Place all veggies desired on to a baking sheet.  
Drizzle liberally with olive oil, salt & pepper.
Roast (approx) 30-40 minutes, checking frequently after about 20 minutes to get the doneness desired.

Personal preference - add tomatoes after 15 minutes of roasting.

TIP: I line my baking sheet with heavy duty foil, then put a pre-cut piece of parchment on top of foil. I think it cooks better, without sticking/burning on the baking sheet.  Plus clean up is a breeze!  I know some of you out there would rather just wash the sheet pan, and that's okay.  I'm just lazy.


Saturday, June 17, 2017

Pizza Resurrected

I feel like I need to re-do a post on pizza.  My pizza making has evolved over the last few years with the purchase of my first baking steel.  Oh.My.Goodness. is all I'll say!!   Worth every penny!!  I now have 2 baking steels...one stays in my oven and the other is a steel griddle that stays on my stove top.

HERE is the pizza dough I've been using.  Since it's a '72 hour' dough (which takes no time at all to throw together)...remember to make the dough a few days ahead of when you'll need it.  OR...just keep dough in your fridge at.all.times! Just remember to take it out an hour or so before you want to make your pizza.  I preheat my oven/baking steel to 550 for at least 30-40 minutes.
This is what you'll need
YES, I weigh everything.  For any type of bread baking, my digital scale is my best friend.

 Throw all the dry ingredients in a big bowl; whisk together

Add water. Mix it all together...I use a plastic bowl scraper

Cover with plastic wrap and leave in on the counter for 24 hours

For some reason, I didn't take photos of dividing the dough after the 24 hour resting.  
Those steps are in the recipe below.

This is what it looks like after only 7 minutes in a 550 F (convection) oven on a baking steel.
Mine's on the top...pepperoni, mushrooms & onions
Hubs in on the bottom...same as mine except he adds (gag) green olives

So here you go:
72 Hour Pizza Dough
3-3/4 c. (500 grams) flour (I usually use bread flour but was out...all-purpose is fine)
2 tsp. (16 grams) salt
1/4 tsp. (1 gram) yeast
1-1/2 c. (350 grams) water

Whisk together dry ingredients; add water.
Mix together until it comes together and forms a ball (it will appear dry).
Cover with plastic; leave on counter for 24 hours.

Next day:
Sprinkle flour on your work surface and gently bring the dough together...at this point it will appear wet.  
Divide dough into 4.  
Gently work the dough, adding flour as  needed so it doesn't stick to your hands, until it turns into a smooth little ball (here's where you might want to watch the video from the link listed above).  
Place in plastic containers that have been sprayed with cooking spray (or drizzled with a bit of olive oil).  I use 16 oz. round deli containers I purchase at my local Gordon Food Service.
Put in fridge for 2 days.

When it's Pizza Day, take dough out of the fridge at least an hour before you need it.  I find, for hubs and me, one dough ball per person makes a great personal pizza (when we're hungry)

Preheat oven to 550 F convection bake (if you have it)...for at least 30-40 minutes...with the pizza steel inside preheating, too. 

Pat your dough into whatever shape you want.  If you use round containers, it's easy to make a round pizza!!  I tend to make rectangular so both pizzas will fit, side-by-side, on the parchment and on the baking steel at the same time.  After I get the size I want, I put it on parchment paper...and bake it on the paper, too.   Don't get me wrong, you can use a pizza paddle and 'launch' your pizza on to your steel.  I use parchment because I'm basically lazy and it makes cleanup a breeze.

I'm not even going to tell you about sauce, toppings or cheese...everybody likes their own personal preferences.  But...don't overload it, this is a case where less-is-more.  I will say I put over 1/2 of the cheese on first right after the sauce.  If I'm using pepperoni, I put that on last after the last sprinkling of cheese.  But...that's hub's and my preference.

In my oven:
550F + 7 minutes = a perfect pizza

ENJOY!!


Thursday, June 8, 2017

Eating...

Eating out is a common occurrence in my life.  Yes, I know I should cook/eat at home more than I do. But...

Today, my friend Olga, from over at Okay Let's Go Quilting was in town.  After perusing a few quilt shops, lunch was in order.  We always have an adventure in our dining!!  Today was no different.  We went HERE for lunch.  Our cute waiter talked us into an adult beverage...but it had tea in it so it must be healthy, right?!  Delish is all I'll say!  We each had soup and shared a blackened chicken wrap.